Automation scripts are used to run some selected tests automatically and over a longer period of time. You start the test and everything runs completely automatically. In addition, the automation offers the possibility of using entered information such as a ticket or customer number in the logs, email dispatch or file storage. You can find out more about this in the news article Use information about PC & tester information effectively.
Sample scripts in the program
Depending on how the program is run, you will find 4 – 8 sample scripts in the Automation menu. The first 4 sample scripts are intended for hardware testing only. The other 4 pieces combine testing of the hardware as well as the complete, audit-proof and certified deletion of all data with toolstar®shredderLX or toolstar®shredderWIN.
The sample scripts offer an optimal introduction to automation in toolstar®. At the beginning you can simply start it as specified and use it to make adjustments as you continue to use the software and save it as your own. Examples of saving scripts could be:
- Special requirements of a customer: Script with a customer's name
- Special requirements for series: Script with the name of the devices in the series
- Special requirements for deleting a customer group: Script named Lawyers
Before starting the script
- Set Tests
You can create groups and tests here. All tests in a group run simultaneously. You can create as many tests and groups with different settings as you like here. However, you should align the load with the script's target devices and plan accordingly. - Configure Reports
Here you can, on the one hand, view the Screen Report (The report on the monitor after the test is completed), the Physical Reports (As File after the test on the stick or in the network) as well as configure email reports. Each report can be customized. - Total duration for all tests
Here you specify a duration that applies to all tests and groups in the test. Once this condition is reached, the test is ended. - Queries at start
Here you can set which dialogs are queried at start. Possible options are Confirmation to start the script, Total duration, Information about PC and tester, Output file names, Minimum numbers. Our recommendation here is to only select the information about the PC and tester and to set all other options in advance and assign variables if necessary. - Error options
Here you can set what should happen as soon as one of the tests in the process reports an error, as in Crashand previous results should be dealt with and whether an e-mail should be sent in the event of an error. - Hardware monitoring during the test
Here you can Activate live hardware monitoring and monitor and record hardware monitoring over the entire duration of the test. By default, everything is recorded, output after each group and at the end in the report and displayed on the monitor during testing. - When Finished
Once the script finishes (all tests have run and reports have been saved), the following will be executed. Here you can choose between never, always, only if passed, only if errors occurred as conditions. The most popular option here is Shutdown: only if passed - Information about PC and tester
You can find further information in this News article. Basically, you can query your own information here, which cannot be read out from the device. This could, for example, be a ticket number for the subject of the email. - More options
Advanced audio test options

While the tests are running
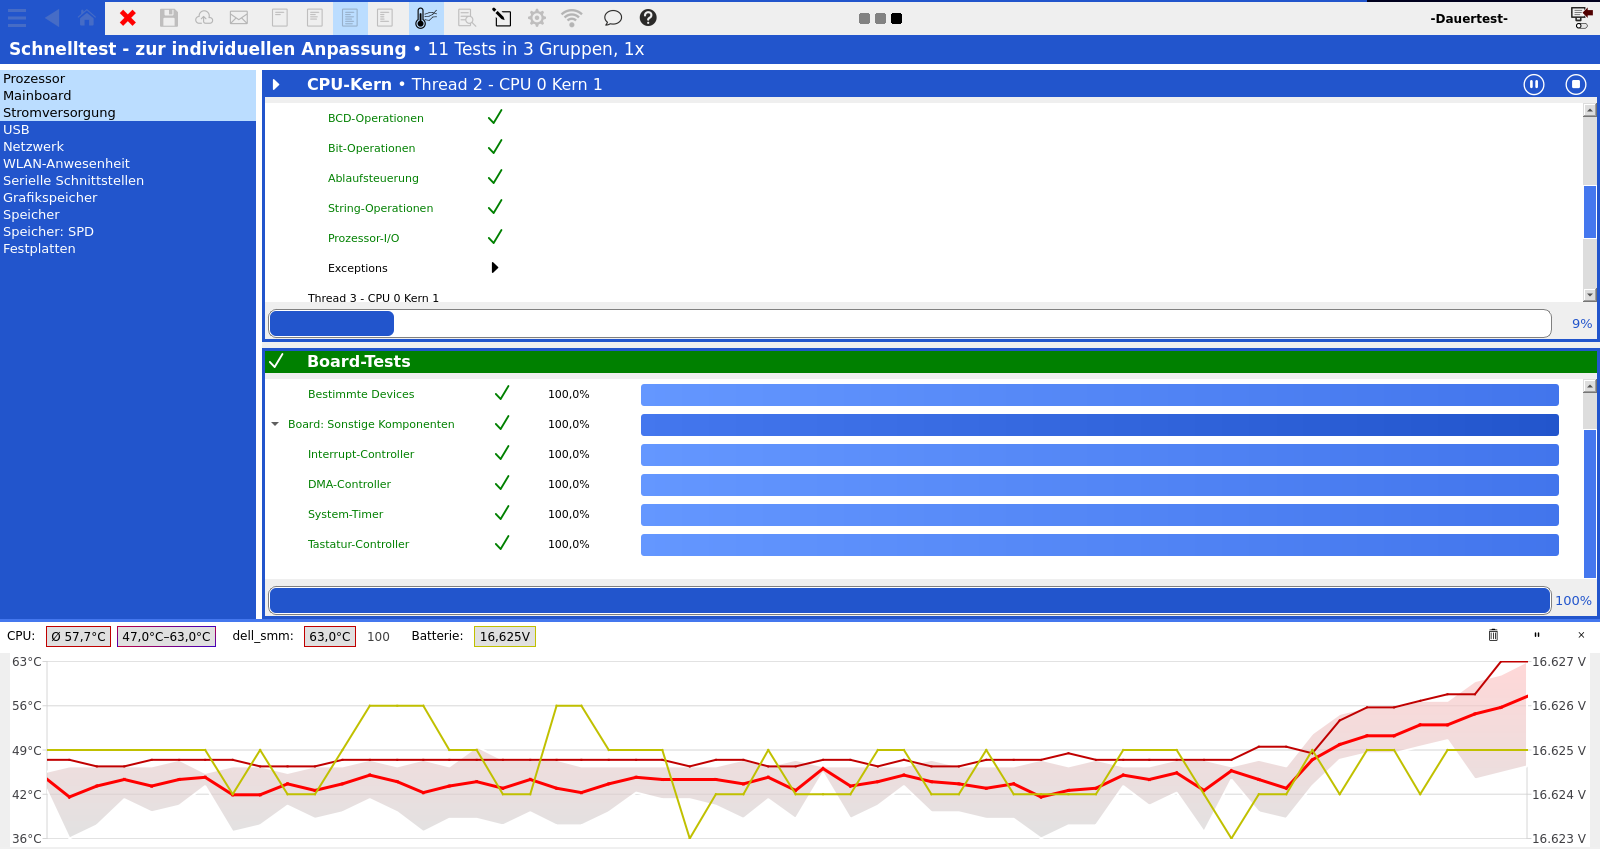
While the automation script is running, you will see a status indicator as a "ticker" under the clock: elapsed time, current run, remaining time (if the duration was specified as time). Each test is displayed as a tile and allows the status to be tracked. If errors occur, they are reported directly in the tile. In the lower area you can see the live hardware monitoring.
After all tests are completed
After the tests are completed, the result report will be presented. If an error occurs since the start of toolstar®testLX, toolstar®shredderLX, toolstar®testWIN and toolstar®shredderWIN (or the last Resetting results) was reported, this window has a red border. At this point, all documents have already been saved and emails have been sent. You can now switch off the device or test special components, for example in an individual test.

General settings and script specific
In the programs toolstar®testLX, toolstar®shredderLX, toolstar ®testWIN and toolstar®shredderWIN there are global settings (main menu-> Settings) and script specific settings. The settings you specify in the scripts always override the general settings. Basically, for example, you always create your company information such as logos globally and use them in every script. If you ever want to change that, just change this one script and all the others keep the global settings.