By default, toolstar®testLX and toolstar®shredderLX all outputs (reports, protocols and certificates) on the USB stick in the testlx directory . This happens if you only enter an output name without a path in the file name fields. However, you can also save to non-local media in various ways.
Save to a network directory under Windows
All output documents from toolstar®testLX and toolstar®shredderLX can also be converted to a network drive by specifying a network path within the file name field in the program save. To do this, you must first create a share on Windows that serves as the output destination. You can create this release as follows:
1. Create a new folder on your computer or server to serve as the storage destination.
2. Set the required shares for the folder one after the other to make it accessible from the network.
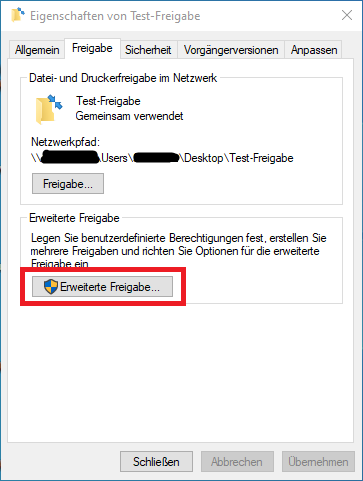
2.1. Open the properties of the folder and click on “Advanced sharing”.
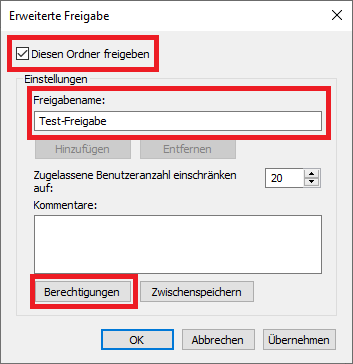
2.2. Now enter a name for the release (without spaces or special characters). You will use this name later in toolstar®testLX and d toolstar®shredderLX within the file name field.
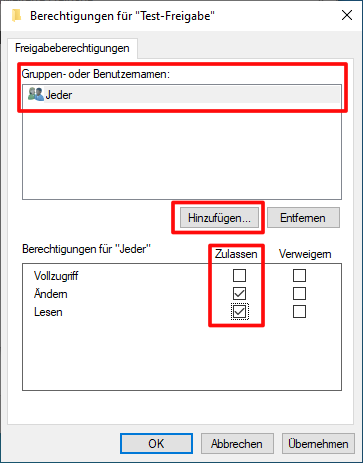
2.3. Next, edit the permissions and assign them depending on which user you want to use for access. We recommend a special user for toolstar®testLX and toolstar®shredderLX, which only has permission for the respective folder and nothing else.
3. Enter the storage path in toolstar®testLX or toolstar®shredderLX as follows.
3.1. If you use shares with authentication:
//Username:Password@ServerIP/ShareName/[FolderPath]/Filename
3.2. If you use passwordless Use shares:
//Server-IP/ShareName/[FolderPath]/Filename
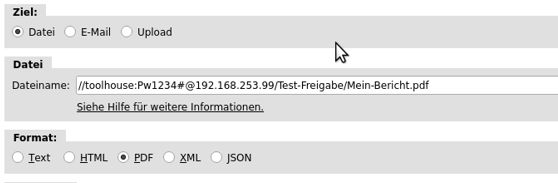
The path for our example from above could look like this:
//toolhouse: Pw1234#@192.168.253.99/Test-release/My-report.pdf
You can also save to Linux shares. The logic is the same as on Windows. Also specifying the path within toolstar®testLX or toolstar®shredderLX is no different from saving to a Windows or Linux share.
Mount network drives and get “permanent” access
You can find out more about this topic in this KB article.
Save to an FTP / SFTP server
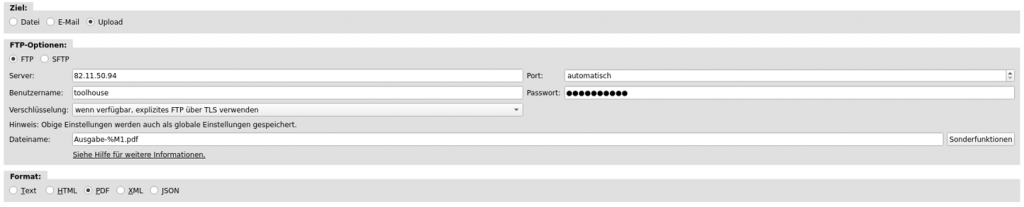
In addition to saving as a local file or as a file in a network directory, you can also save to an FTP server or SFTP server. To do this, simply click on the “Upload” item in the save dialog. There you can then enter all access data and the file name. As soon as you press Save, the document will be uploaded to the specified server. By specifying a folder path with wildcards such as %S, %M1, etc., you can also have a folder structure automatically created.
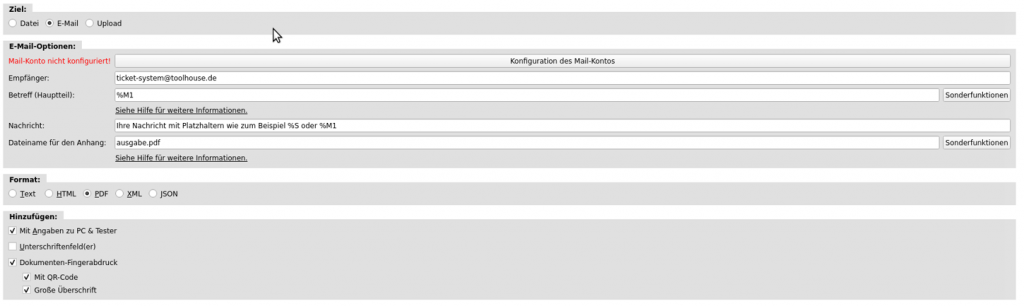
Save documents via email in a ticket system
Under Email you can have an email sent to you or enter it into a ticket system with a suitable subject and text. You can use special functions such as %S, %M1, etc. within the subject and content of the email and thus create templates for your ticket system.
Print documents via email
Many modern network printers support email printing. To do this, you can simply send an email to your printer and it will print all the documents included in the attachment. Basically, the emails follow in toolstar®testLX and toolstar®shredderLX a common standard, so no extra configuration is necessary.