In this article, you will learn how to enter individual information per disk when deleting disks. This is particularly useful if you have multiple hard drives (in the standard version of toolstar ®shredderLX and toolstar®shredderWIN up to 4 pieces at the same time) and these are from different devices and/or customers, for which you then have to enter a special asset or customer number.
The PC and tester information in general
You can find information about the settings of the PC and tester information in our News article.
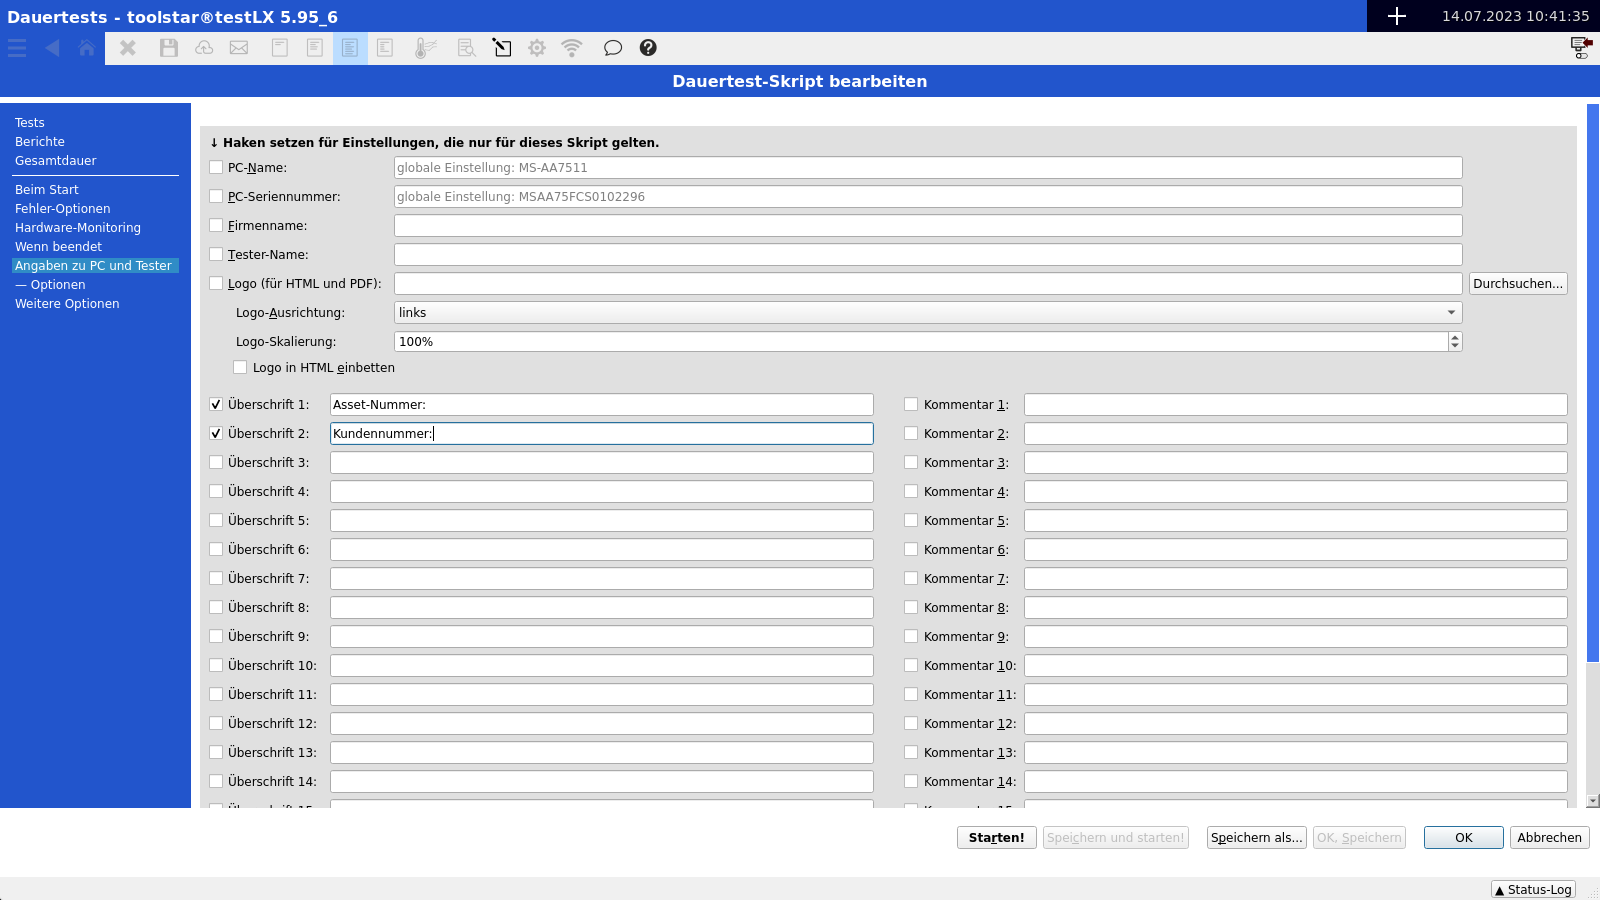
General field settings and values
In the general settings you define the fields that you later want to enter for each hard drive. In this example, the two comment fields 1 and 2 were used. A checkbox is placed in front of headings 1 and 2 because the values of the heading are always the same. The Comment 1 and 2 fields are left blank because values should always be entered dynamically here later. However, you could put the checkbox before, for example, comment 1 and enter the character "#" if your asset numbers always start with a "#".
You can also specify under “━Options” that some fields are mandatory and which fields should be displayed. By default, all 20 possible comment fields are displayed, regardless of whether something has been entered in them.
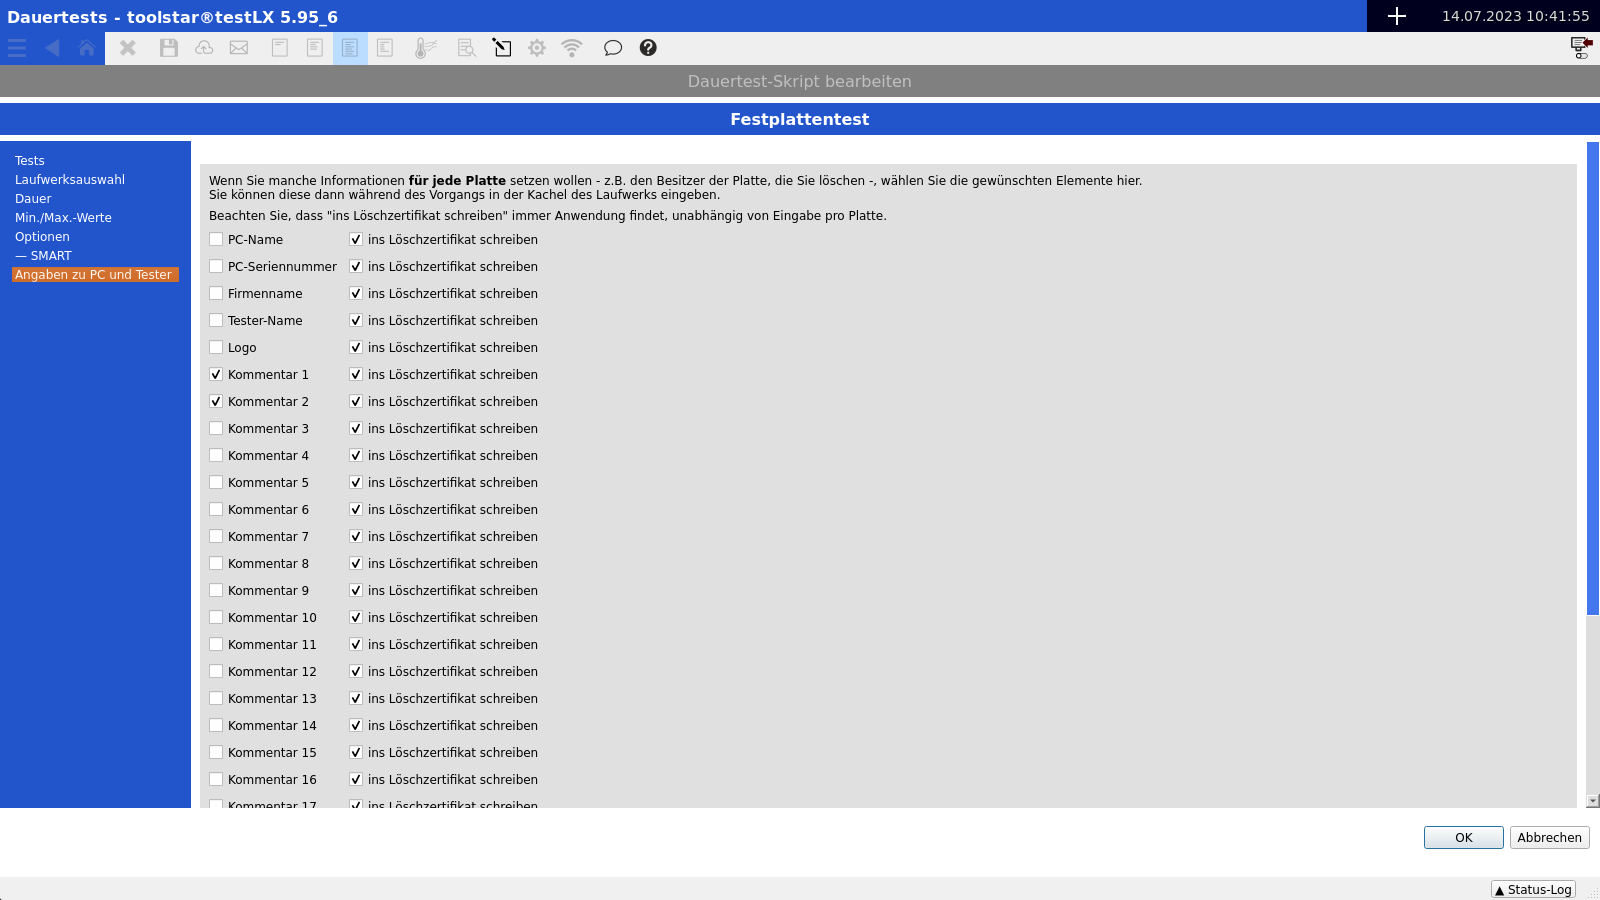
Selection of fields per hard drive
In order to be able to enter the previously set fields for each hard drive, you must open the hard drive test in the table under Tests. On the left side, next to the tests and the drive selection, you will also find the item “Information about PC and tester”. Place a checkbox here in the fields that you previously provided with headings in the general PC and tester information. In addition, you can choose whether this field should also be included in the erase certificate. An example of a field that is not written to the erasure certificate would be an internal management number. This number must be recorded for each hard drive but may not be suitable for the customer. This field, although not displayed, can be used in automatic file names, erase logs and also when saving to the network.
During the erasure process
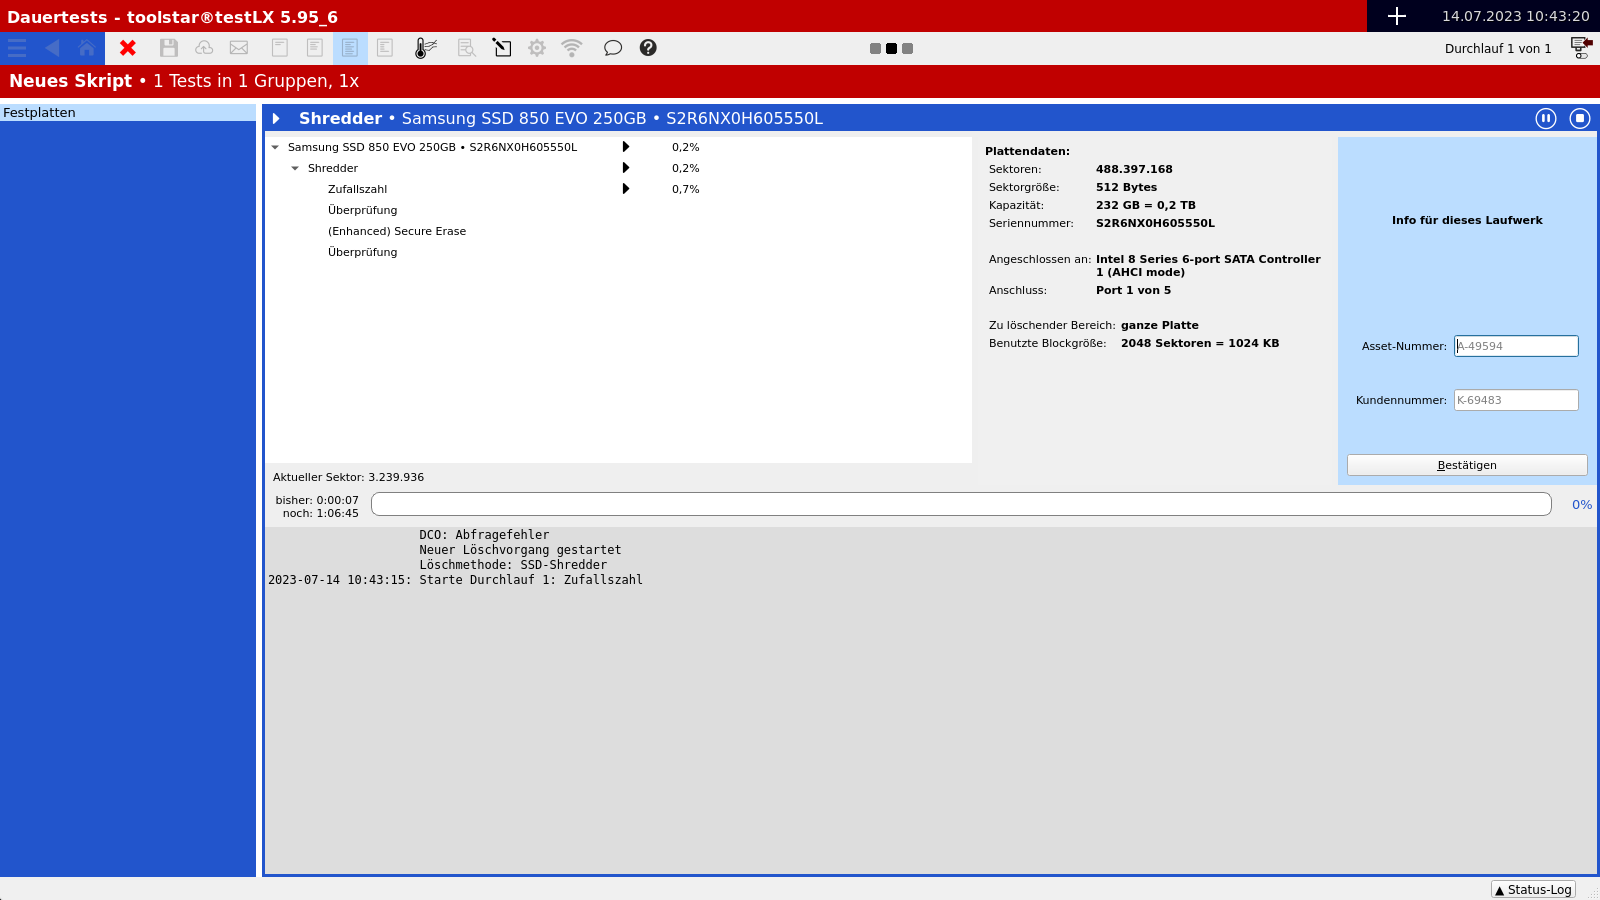
During sanitization and/or testing, you will now find a blue block where you can set the individual field values. If you have already entered values in the general dialog before deleting, these will now be displayed as the default setting. Once you're done, click "Confirm" and the values will be applied to this plate (CAUTION! After confirming, the values can no longer be changed). If the erasure and/or test process has already been completed and no values have been stored yet, the area yellow and waits for your input. The process is only completed when values have been stored on all data carriers.
Notice:
As soon as a hard drive has been completely deleted, the certificate is saved. Even if other hard drives are not ready yet. For example, if you save to the network, you will find some certificates ready even if the program is still running.
Endurance test settings and global settings
You can also enter the field settings globally in the program so that they apply to every output and every newly created endurance test (in the example above, the values were only entered for one endurance test). You can find the general settings via Main menu->Settings->Information about PC and tester or via Quick start page (⌂ symbol)->Settings->Information about PC and tester.
Example scenario: Entering an asset and customer number
- Open a new long-term test and follow it with the item “Information about PC and tester”.
- Under Comment 1, enter Asset Number: as the heading.
- Under comment 2, enter Customer number: as the heading.
- Open the “Tests” item at the top on the left
- Add a new test hard drive.
- Also on the left side, go to “Information about PC and tester”.
- Select the check boxes for comments 1 and 2 here
- Go to Tests on the left
- Add the item Delete completely (shredder) and make the settings for the certificate and the erasure method
If you start the long-term test now, you will first receive a general query for the PC and tester information (these can be ignored or deactivated). There you can enter information that may be the same for each medium. After clicking O.K. The erasure process starts and you can then enter individual information for each plate on the left side.oik