What can I use the toolstar®PEBuilder for?
Due to the ability to integrate and use not only toolstar® programs, the toolstar®PEBuilder can cover many different areas in your company. Possible usage scenarios could be, for example:
- Testing hardware with toolstar®testWIN or other test programs
- Copying data carriers with HDClone® or other copy programs
- Restoring defective files, for example with toolstar®recoveryPRO or other programs, even if the operating system no longer starts
- Rescuing defective Windows® installations with checkdisk or other programs
- The installation of different Windows® operating systems with just one boot medium
- A mini Windows® operating system in your pocket
- Removing viruses from installations with antivirus programs
- Installing firmware updates that cause problems within an installed Windows®
- Editing system files that are locked due to current usage in running and installed Windows®
- Editing the registry information of the installed Windows® if there are errors in the current installation
- and many more scenarios...
Special features of the toolstar®PEBuilder
In contrast to the solution provided by Microsoft®, the toolstar®PEBuilder a completely graphical interface with hints and tips for every single step. This saves you a lot of different CMD commands. In addition, the toolstar®PEBuilder Pro can use an existing configuration Save as a template and later the settings that have already been set can be loaded and used immediately. This saves time and relieves you of a repetitive task.
Instructions for creating bootable USB sticks
In this section, we'll take a look at the different windows and steps to create a bootable USB stick with Windows®PE/RE. For each step you will receive a few hints and tips that will help you use the program.
Specifying the general options
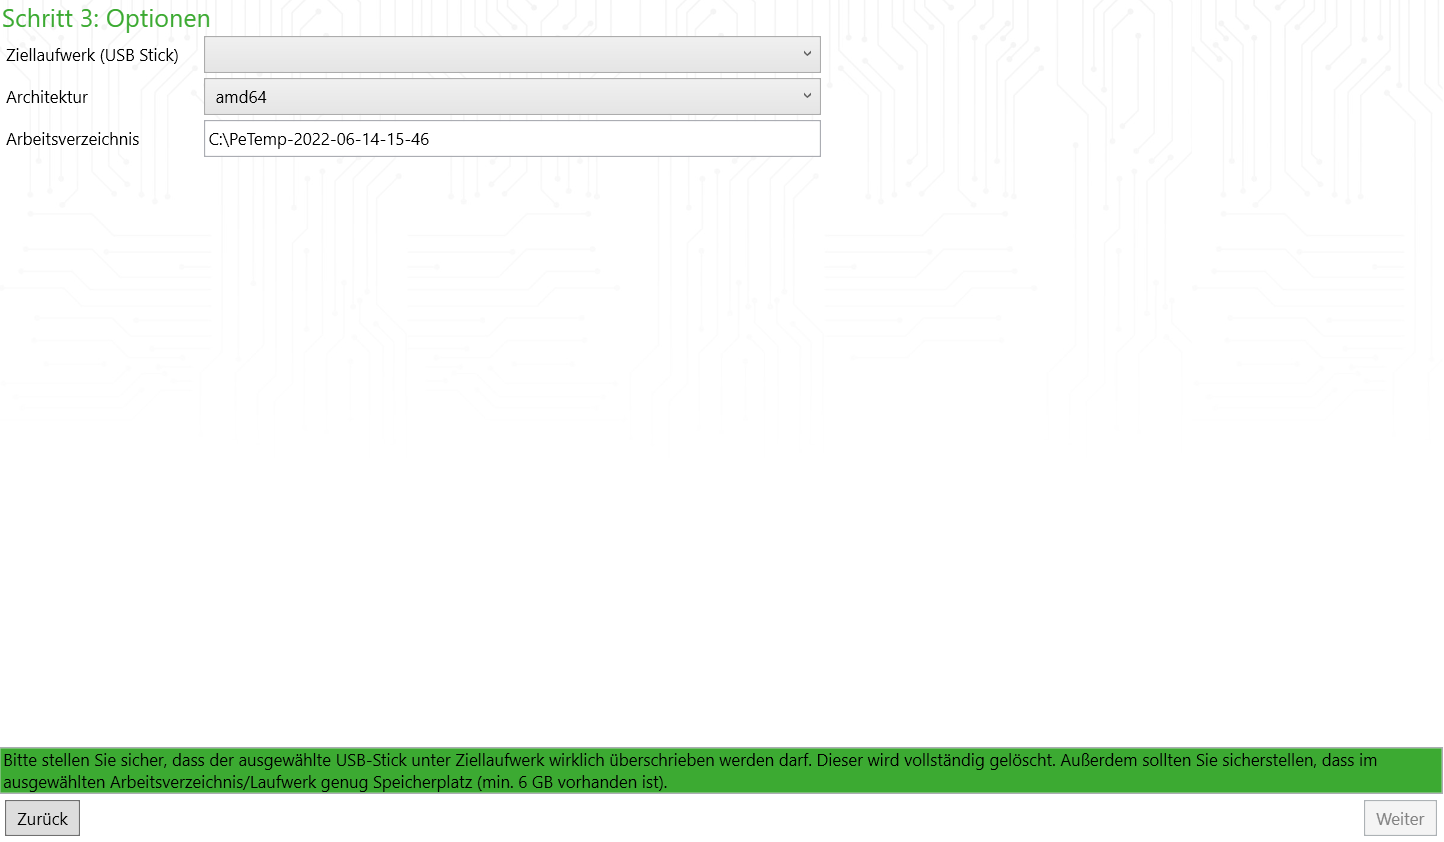
Here you specify which USB stick the system should be installed on (all data on the target medium will be deleted/overwritten) and which architecture you want to use. The default choice amd64 will work 99% of the time on your systems. If you want to use older devices with older CPUs, you must select x86 here. The target directory is only temporary and will be deleted after complete creation or in the event of an error. You should only specify something else here if you have less than 8 GB of free space on the C:/ drive. The storage space may vary depending on the settings chosen such as DLLs, drivers, etc. The 8GB specified here is an average that is usually sufficient.
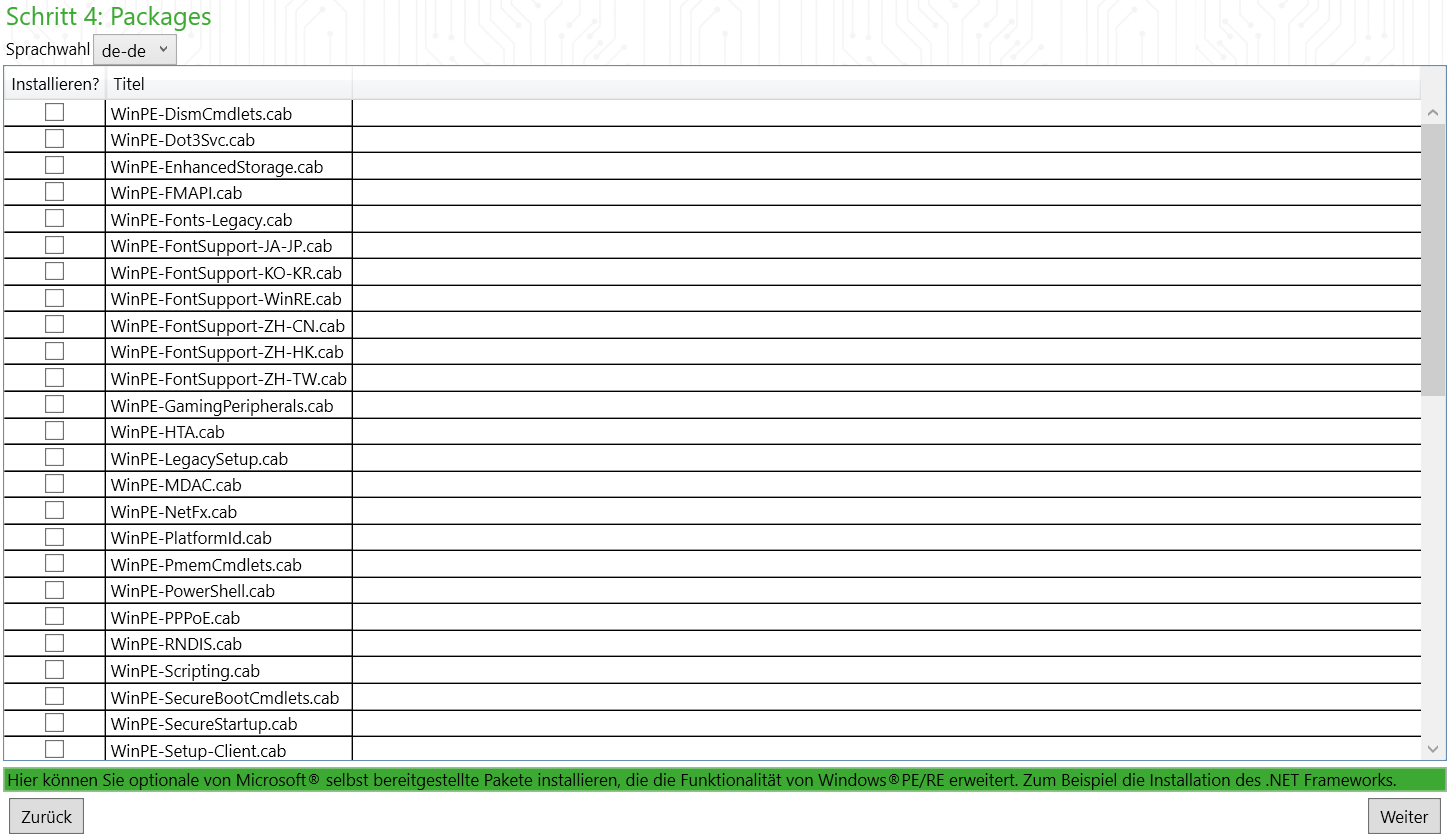
Selection of special Windows®PE packages
The Windows®PE/RE environment is a partially restricted Windows® environment that was specifically designed for recovery, test and deployment scenarios. That's why not all Windows programs run under Windows®PE/RE. Microsoft therefore provides special CAB packages that you can select here and integrate into the Windows®PE/RE environment. This expands the system with additional functions and files required for various programs. The .NET Framework is a good example of a useful package used by many programs. By the way, the toolstar®PEBuilder is also based on .NET and here in the special on .NET Core 5 with WPF as the basis for the graphical interface.

Adding your own and toolstar® programs
In this step you have the opportunity to easily install your own programs in Windows®PE. The programs selected here are not integrated into the RAM disk, but are stored on the USB stick. This offers the installed programs the opportunity to save files that are not deleted after every shutdown. The prefabricated tiles offer an easy way to install standard programs or to store your own. When selecting your own programs, please make sure to only select the folder with the program files and not only to integrate the .EXE file but also to have the program's required libraries copied if necessary. A good example is the toolstar®PEBuilder itself. Here you not only need the PEBuilder.exe but also the .NET DLLs. If the toolstar®PEBuilder is located in the C:/PEBuilder/PEBuilder-Toolhouse directory, then select the PEBuilder-Toolhouse directory at this point. This will copy the .EXE file and any other files needed.
Adding drivers for specific hardware components
The standard Windows®PE/RE environment supports a variety of components such as hard drives, graphics cards and expansion cards. However, for certain special devices it may be necessary to integrate the manufacturer drivers. A good example of this are WLAN cards. These cannot be addressed by Windows® by default and require the manufacturer's driver package. To do this, simply select the folder in which the driver is located and the toolstar ®PEBuilder takes care of installing the files. Please make sure to only insert the drivers that you need. A number that is too large also increases the memory requirement and therefore uses more memory after the environment starts. This is a problem, especially when testing RAM, and it could also lead to problems on systems with little available RAM.

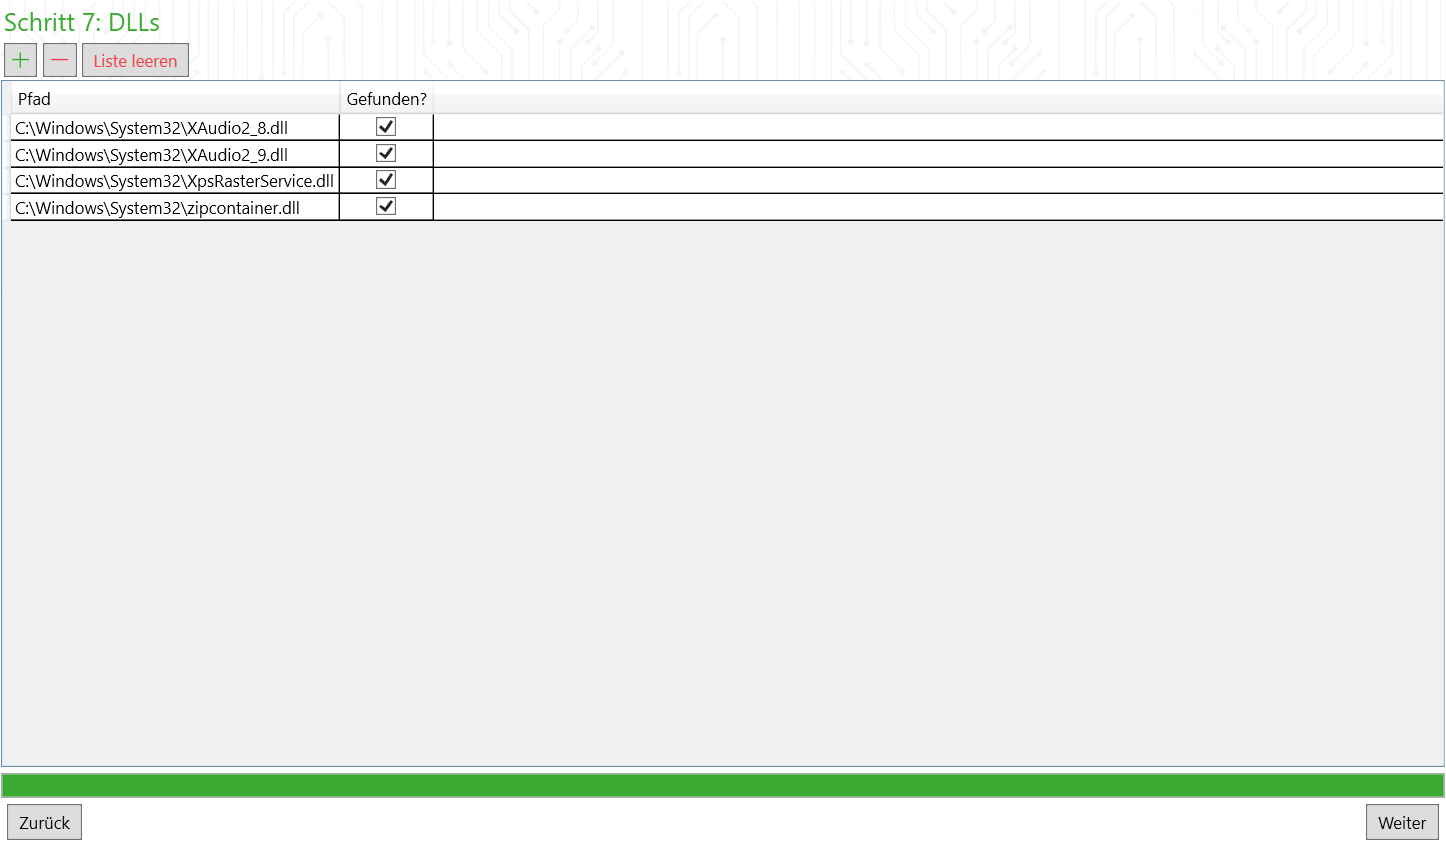
Store additional DLLs in the Windows® standard path
Selected DLLs can now be stored in the standard path /Windows/System32. Certain programs may require some Windows® DLLs from your installation that are not integrated into a Windows®PE/RE environment by default. Most programs first look in Windows/System32 and then, if necessary, in their own start directory for the program files they need. If none of the programs you use require special DLLs or already provide all the required DLLs, you do not need to do anything in this step.
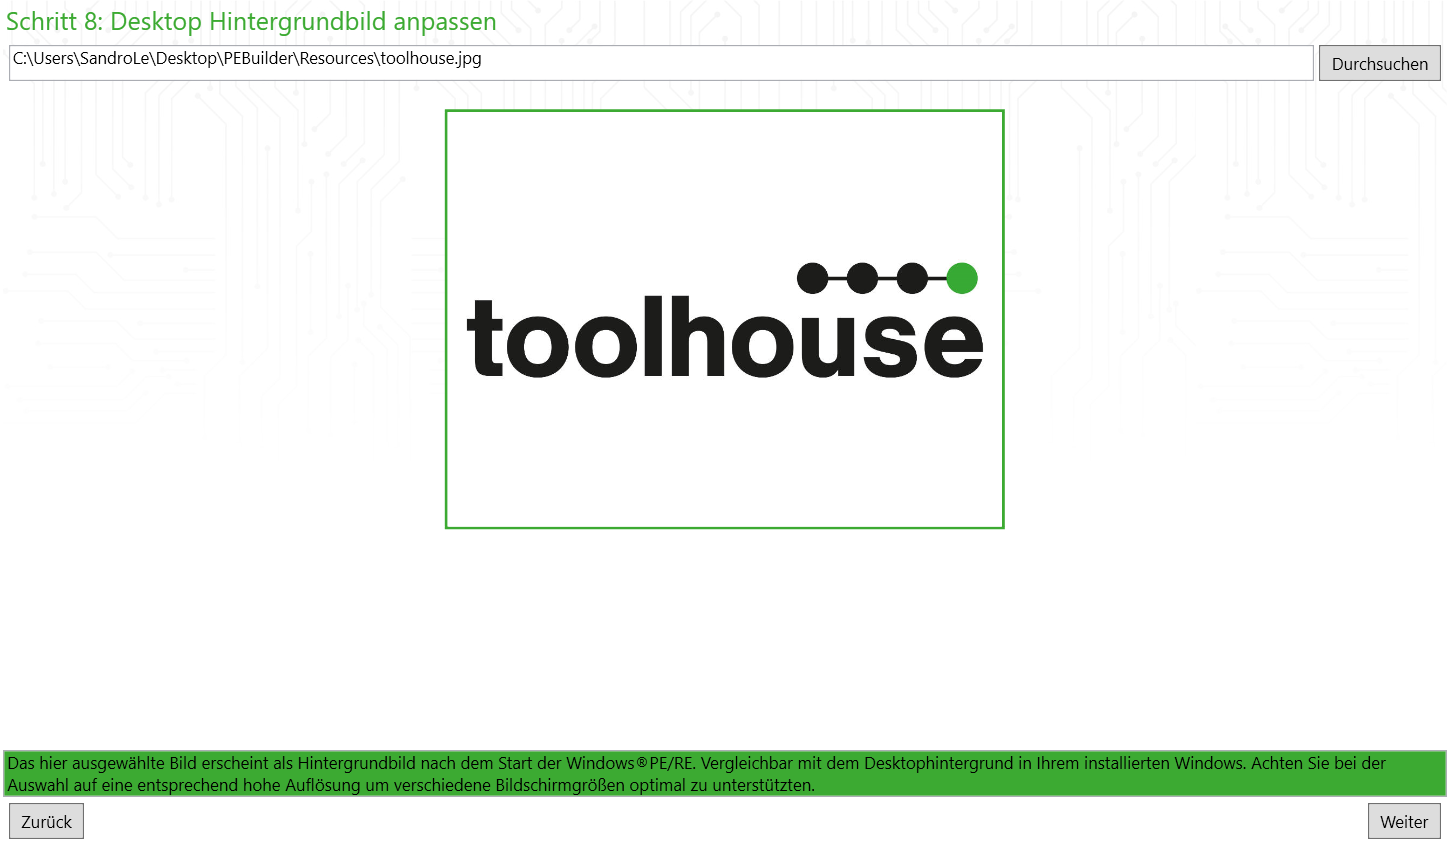
Change the background image
In this step you can set your own background image that will appear behind the CMD window after startup. If you do not change the settings, the toolhouse logo will automatically be used. Please make sure to save the image in size 800×600. If you use a different size, the image may not be displayed at all or may only be displayed in insufficient resolution.
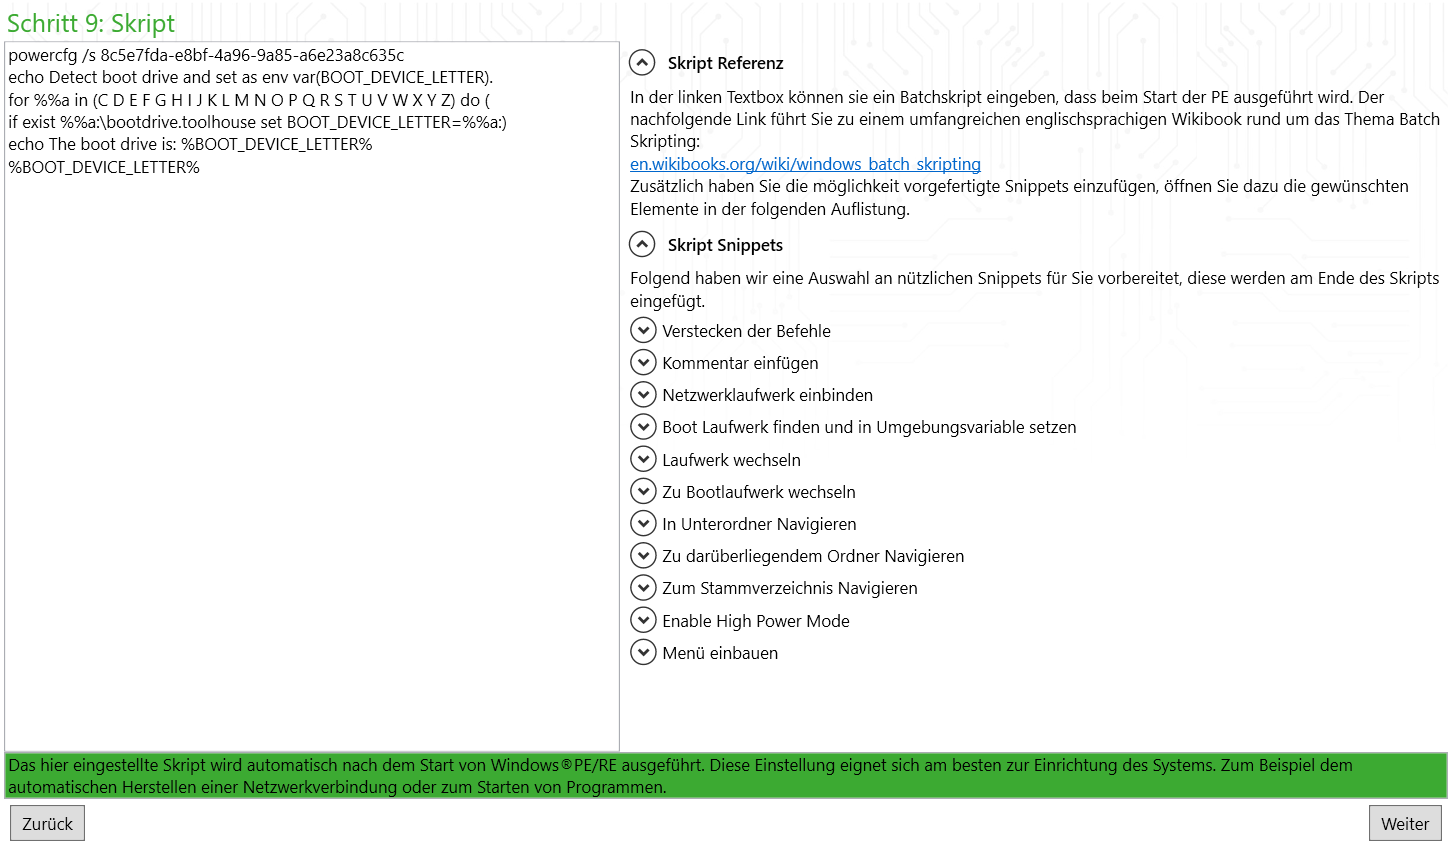
The startup script for the automation
Here you specify which commands should be executed by default after starting the Windows®PE/RE environment. These could be setup commands or program calls. By default it will search for the boot drive (your USB stick) and then set this as the default directory. This means you can directly access all programs and files stored on the USB stick. On the right you will find some useful commands for inserting including explanations. The item “Install menu” automatically creates an interactive menu of all the programs you have stored from step 5 (here in the instructions step 3). You can then use this menu after starting the Windows®PE/RE environment.
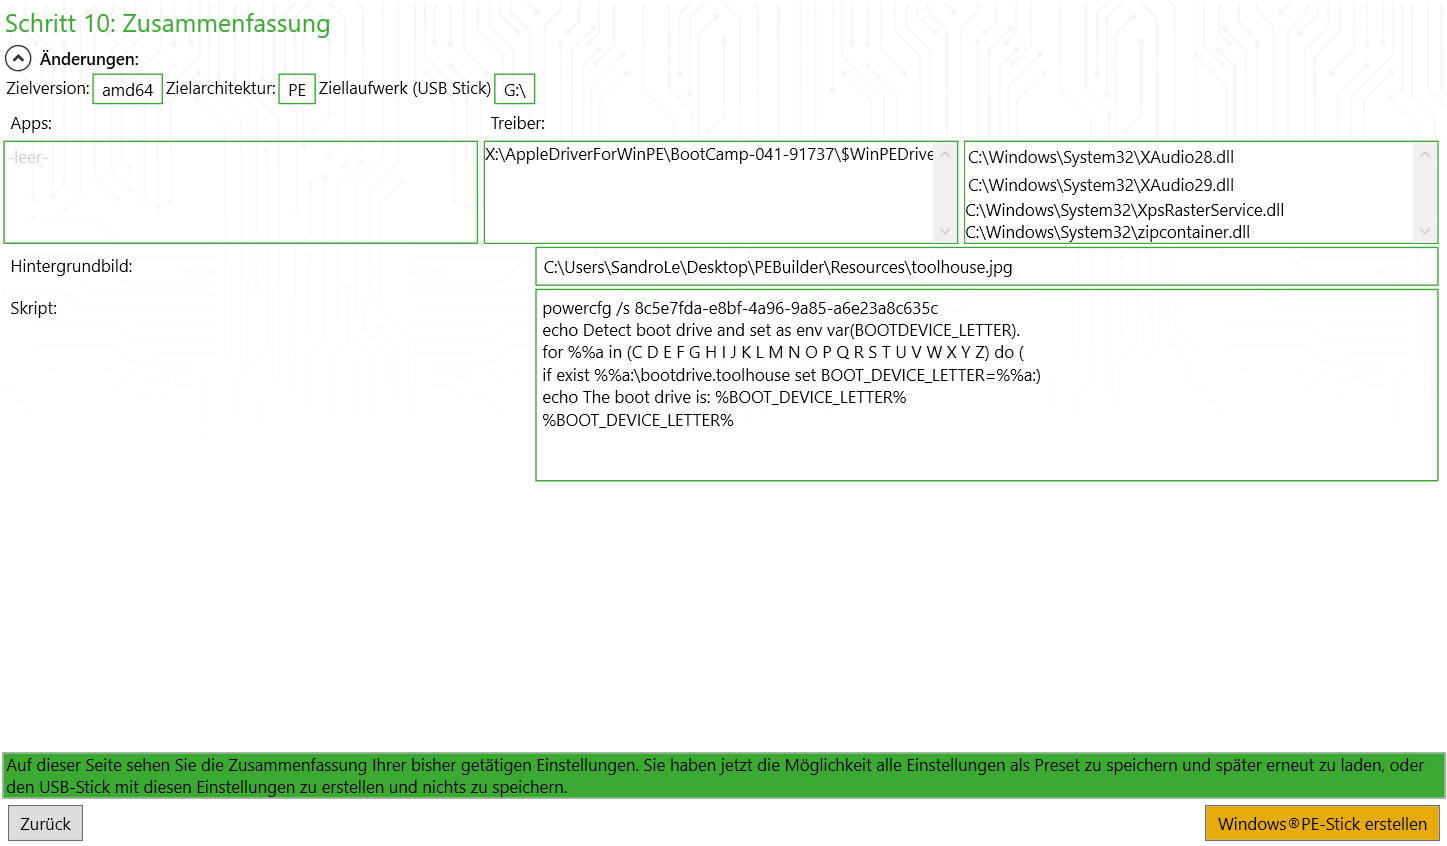
Summary of your review and storage settings
In the penultimate step you will see a summary of all the settings from the previous steps. If you own the toolstar®PEBuilder Pro, you can At this point, save all settings as a template and load all settings when you start the program later without having to define them again. This is particularly useful if you often have to create USB sticks with the same settings.

The processing
In the last step, you can see how far the creation has progressed in real time on the screen. Please note that the process may take different amounts of time depending on the amount of programs, drivers and DLLs added. If an error occurs, the corresponding point is marked red. In this case, you may need to change the settings within the programs, drivers or DLLs.
Adding very many or very large drivers can lead to a problem during creation. Please make sure to only add the files you need.
All steps described here apart from step 3 (here in the instructions step 1) are optional and can simply be skipped for quick creation. The standard settings we have set are already set so that an executable Windows®PE/RE environment is created.
Your comments and suggestions
Even though the toolstar®PEBuilder is a free program, we are We would be very grateful for all comments, regardless of whether they are errors or requests. If you have found an error in the program or have an idea for improving the program, please let us know. You are welcome to call us at any time (08441 504427), via Email (info@toolhouse.de) or via the homepage reach.
Thank you for your interest in our company and products
We are very pleased that you have reached this point in the article. You have probably read this carefully and would like to use the product in your company in the future. As a thank you for your interest in our company and the products that we offer can be obtained with the voucher code thank-you-pebuilder-pro a 50% discount on the PRO version. You can use the voucher directly in Redeem shopping cart.