There are two different types of toolstar®testLX / toolstar®shredderLX USB stick updates.
- Only update the program version alone
- Update operating system AND program version together
Depending on which update is provided by toolhouse, please follow the corresponding instructions.
If you are not sure, please always install both parts (program version and operating system).
You will find instructions below under “Update the program version only” and under “Update the program version and operating system” toolstar®testLX / toolstar®shredderLX to carry out the USB stick update.
As a first step, please check your Linux kernel (see *.txt on your stick).
If the kernel you are currently using is smaller than 2023-4.R1, it is necessary to install the new operating system according to the instructions below .
If your kernel is up to date, please continue as follows:
Update program version / import program package
- Download your program package (e.g. ABCDE-12345_testlx.zip). You can find the link to this in the package requested from the customer portal.
- Unzip the zip file.
- Overwrite the received testlx folder and copy it to your USB stick.
- The USB stick is now bootable and ready for use.
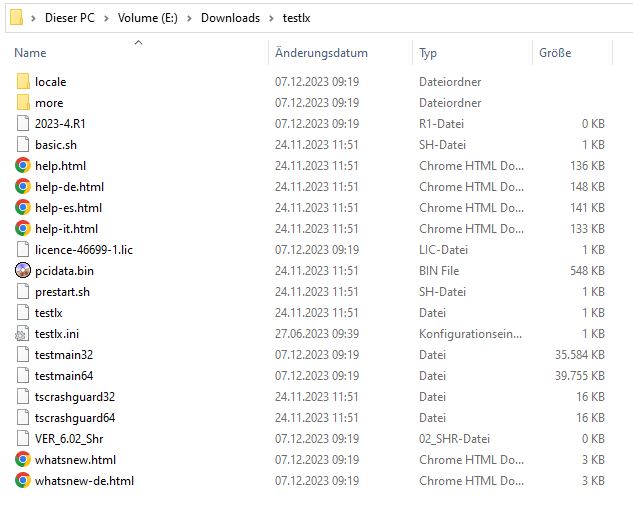
After unpacking the program package, you will receive a testlx folder
Copy the entire folder overwriting it to your stick (previously loaded with the Linux kernel image).
The testlx folder contains the following files:
Update operating system
- Download the current universal Linux kernel image including image writer. You can find the link to this in the package requested from the customer portal.
- Unzip the zip file.
- Import the current Linux kernel image onto your registered USB stick using the image writer.
After unzipping, the following files will be available to you:
Start the unpacked toolhouse-image-writer.exe and select the unpacked image as the source:
Click “Start”. The image will now be imported.
When the process is finished, please confirm with “OK”
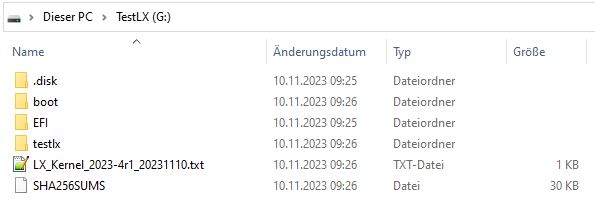
The contents of your stick now look like this:
Please note: In order for the software to be fully functional, you must then import your individual program package.
Personal files
In our customer portal you have the option of uploading personal files, which are then automatically be integrated into your program package.
These files can be uploaded under “Account” and then in the “Documents” section.
This includes the ini file (settings) as well as created endurance tests and your individual logo.
Everything you upload is seamlessly integrated into your program package and is available for you to use.


